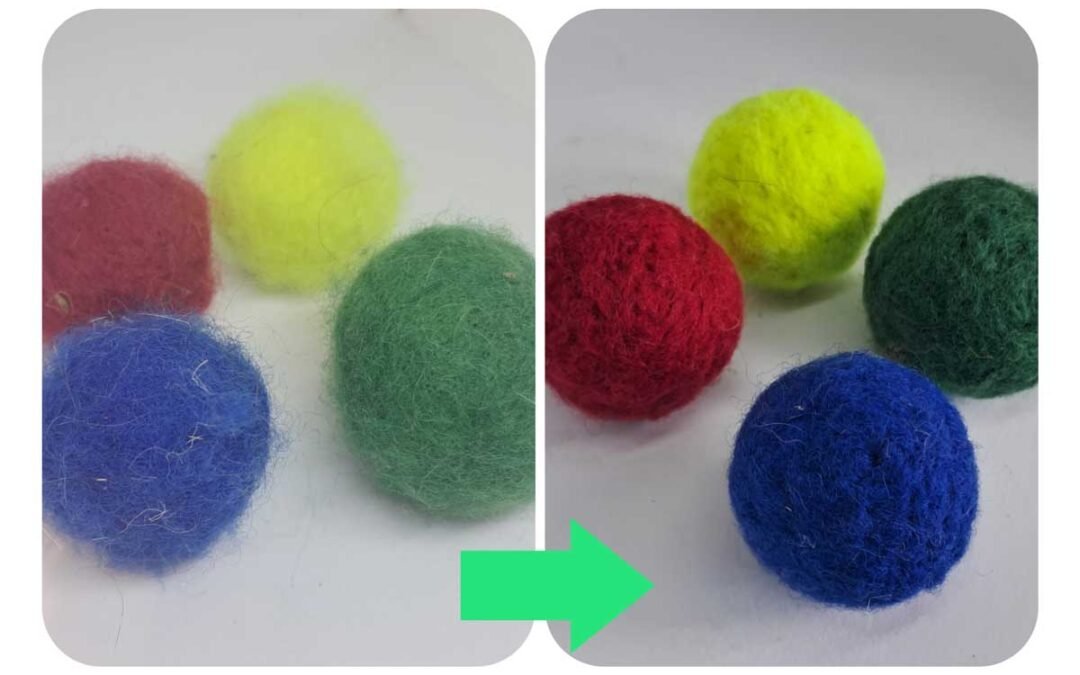
On one hand, I could just keep selling you Fluffy Balls as your cat destroys them. But I also believe in repairing things, and Fluffy Balls are not difficult to repair if you have the right tools and know-how.
So I’ve decided to make the tools and know-how available to everyone.
Tools
You’ll need a 40G triangle felting needle.
It is the most-common type of felting needle, so if you have one in your craft supplies already, it’ll probably work.

They are available for purchase in the Kat’s Nip store, though they need to be purchased with another item.
Or you can purchase one from your local craft store. You usually have to ask behind the counter.
Know-how
Roll back into a ball shape between your hands.
In one hand, squeeze the ball together. Use your other hand to poke/stab with the needle until solid again. Feel around for soft spots, and just keep stabbing.
Periodically roll back into shape if it gets a little wonky, and poke in the bulgy bits as you squeeze the ball.
This may take 20 minutes or more.
The video version
Here’s a video of me repairing a Fluffy Ball my cats have been playing with.
Needle Felting Tips
These simple rules will help you repair your Fluffy Ball catnip toys.

Straight in, straight out
Never change the angle of your needle while it is inside your Fluffy Ball.
This may result in the tip of your needle breaking off inside your project, which can present risks to your cat when they play with it.

Aim for half-way
You do not need to poke the entire way through, just to the middle. This will also help protect your fingers.
You’ll feel the catnip on your needle. When you hit this, you’ve gone deep-enough.

Watch your fingers
The needle is sharp, it will hurt if you poke yourself, and you may bleed.
To prevent this, try to keep your fingers on the sides of your ball, while poking through the middle.
If you struggle with this and need to rest your project against a surface, you can use a piece of polystyrene on a table.